Wishing you a Healthy, Happy New Year!
Monday, December 30, 2013
Sunday, December 15, 2013
Merry Christmas!
Wishing you a Merry Christmas and a
Healthy Happy New Year!
Sunday, December 8, 2013
IT'S BEGINNING TO LOOK A LOT LIKE CHRISTMAS.....
HOPE YOUR CHRISTMAS IS TREE-MENDOUS!
.
Here are a couple of the clean and simple (CAS) Christmas Cards I made this year.
After visiting so many blogs, I decided to go with white on white because several blogs had used this technique so well and inspired me to try it!
Wishing you all a very
MERRY CHRISTMAS
and a
HEALTHY, HAPPY NEW YEAR!
Wednesday, November 27, 2013
Sunday, October 27, 2013
HALLOWEEN EASY EASEL CARD!
Here's my Easy Easel Halloween Card.
The pattern for this is from Lee Ann Greff.
The image is from an old Stampin' Up set.
The die cuts are from Provo craft. This was fun and easy.
Wishing you all a Happy and Safe Halloween!
More to come!
Monday, September 2, 2013
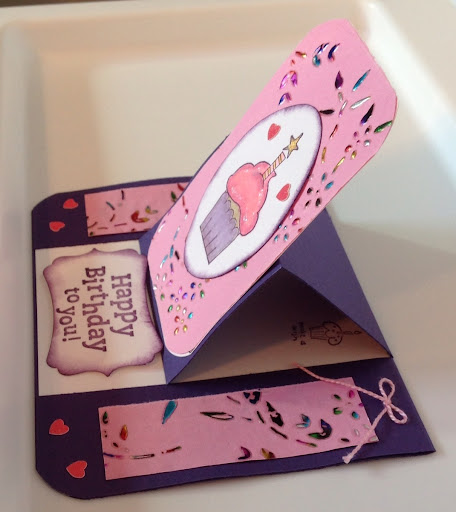
EASY-EASEL BIRTHDAY CARDS! CLEAN AND SIMPLE AND FAST!
While visiting a favorite blog, I found this EASY EASEL card idea. The link and all the directions are below and I can take no credit for this EASY EASEL folded card. It is fast, clean and simple. I needed some birthday cards for the end of the year and made quite a few using this pattern. Here are a few of what I created using this new fold.
Hope you try it.
Many thanks to Lee Ann Greff
http://flowerbug.typepad.com/my_weblog/2013/08/kind-cosy-easel-card.html
O
http://flowerbug.typepad.com/my_weblog/2013/08/kind-cosy-easel-card.html
Here are LeeAnn's directions:
It starts out a normal size card, 5 1/2" X 8 1/2", scored at 4 1/4". Then on one side of the fold you'll cut 1 1/2" from the fold line to the end of the card. Do the same to the other side. Now you have 3 cuts with the center one being 2" wide. The back of the card remains intact. I ran the cut side through the Chevron or Stylish Stripes embossing folder. You can emboss it before or after you cut it doesn't really matter.
After stamping your inside White layer you'll adhere it to the center and then glue the outside flaps down. Then fold that center 2" easel flap in half to create the easel.
Of course it folds flat for mailing.
More to come.....
Wednesday, August 14, 2013
BIRTHDAY CARDS August 2013
Yes, it's still hot and sunny in Florida!
I am still defrosting from living in New York for 55 years!
You will not hear me complaining about the heat, in the summertime, in Florida.
Here are the birthday cards I made for August and September.
This card is for a music teacher!
This card features a teabag fold embellishment and I made this one for an artist friend of mine.
This birthday card is for one of my rubber stamping friends!
This birthday card is for the husband of one of my rubber stamping friends.
This card is very special because it is for a sweet and beautiful 90 year old girlfriend!
This last card is for her daughter.
Thanks for stopping by!
More to come.
More to come.
Anniversary Cards August 2013
The air-conditioner is humming!
The sun is shining!
It's very warm here in Florida.
Time to do my anniversary cards for August and September.
I used Cuttlebug embossing folders and dies with torn paper technique and inked edges.
All the card stock is red and white from Walmart.
The bows are three strands of red thread tied into a bow.
These cards were photographed on a black background.
The card bases are white card stock.
Thanks for stopping by!
More to come!
Saturday, June 15, 2013
Birthday and Anniversary Cards Using "Punch Around The Page"
For June and July, I needed five birthday cards and one anniversary card. I wanted to practice using the Martha Stewart "Punch Around The Page" paper punches that I bought quite a while ago. They work just fine as long as you start with the proper SIZE paper piece. 😳 Following that simple direction has made ALL the difference. Proper sizes link: PUNCH AROUND THE PAGE SIZES. Here are the results:
I hope the folks who receive them, enjoy them! I wish them many healthy, happy returns, too!
Last, but not least, wishing all the Fathers......
Wednesday, May 22, 2013
Birthday Cards For Teenage Boys
Our friends at Heart Gallery called and requested birthday cards for our foster children teenage boys, so my sister and I got busy and created some. My contribution so far is shown below.
I went on line and searched for clip art sports and found some free digital stamps of a football, baseball mitt and a basketball cartoon. I added a layer with the MS "Happy Birthday" punch and then layered the colored images with other punches. I added stars and arrows and knotted threads as embellishments. Because the images were from my printer, I used colored pencils and mineral spirits to color the images. I hope the teenagers enjoy their birthdays!
Thanks for stopping by.
Bella says...More to come!
Subscribe to:
Posts (Atom)